 ultimate-guide
How to Display Large Format Photography
Table of Contents
- Step 1: Match Print Resolution to Viewing Distance
- Step 2: How to Choose Large Wall Art That Fits Your Space
- Step 3: Archival Framing for Fine Art Photography
- Step 4: Mounting Techniques and Weight-Bearing Hardware
- Step 5: Best Lighting for Large Wall Art
- Step 6: Gallery Wall Arrangement and Placement Strategy
- Step 7: Environmental Protection and Long-Term Preservation
- Conclusion: Displaying Large Format Photography With Confidence
- Frequently Asked Questions
Last Updated: October 4, 2026
Step 1: Match Print Resolution to Viewing Distance
The most common mistake in displaying large format photography is treating a massive print like a small one.
Resolution is where that shift begins. A file that looks razor-sharp on a laptop falls apart across a 40-inch wall piece if the pixel count is too low. The farther away the viewer stands, the fewer pixels per inch the eye needs.
DPI, PPI, and Why They Matter for Large Prints
PPI (pixels per inch) describes how many pixels are packed into each inch of the printed image. DPI (dots per inch) describes how many ink droplets the printer lays down.
A practical baseline:
- Prints viewed from 2-3 feet: aim for 240-300 PPI
- Prints viewed from 4-6 feet: 150-180 PPI is acceptable
- Prints viewed from 8+ feet: 100-120 PPI holds up fine
Clients often order a huge canvas from a low-resolution file, then wonder why the detail looks soft.
Adobe's guide to image resolution and print size explains how PPI interacts with physical dimensions, and it is worth reading before you order anything oversized.
Step 2: How to Choose Large Wall Art That Fits Your Space
Choosing large wall art starts with the wall, not the image. The most frequent sizing error is buying a piece too small, which makes even an expensive print look like a postage stamp.
A reliable guideline: the artwork should occupy roughly 60 to 75 percent of the available wall width above a sofa, console, or bed. On a 90-inch wall, that means a piece in the 55- to 65-inch range.
Aspect Ratio and Visual Weight
Aspect ratio is the proportional relationship between an image's width and height, such as 3:2 for most DSLR captures or 4:5 for a vertical portrait.
Visual weight is how much attention a piece pulls relative to its surroundings.
If you are unsure how a piece will sit in your room, augmented reality previews remove most of the guesswork. Our gallery uses AR so you can see a print at true scale on your own wall before ordering.
| Room Type | Target Width vs. Wall | Ideal Aspect Ratio | Visual Weight |
|---|---|---|---|
| Above sofa | 60-75% of wall width | 3:2 or 2:1 panorama | Medium to heavy |
| Bedroom headboard | 50-70% of wall width | 4:5 vertical or 3:2 | Soft to medium |
| Narrow hallway | 40-60% of wall width | 2:3 vertical | Light |
| Dining focal wall | 65-80% of wall width | 3:2 or 1:1 | Heavy |
Step 3: Archival Framing for Fine Art Photography
Archival framing for fine art photography means surrounding a print with materials that will not degrade it over decades, the difference between a piece that outlives you and one that yellows in five years.
The enemy is acid. Standard cardboard mats, cheap backing, and ordinary tape leach acidic compounds that stain paper and fade inks. Museum-grade materials are buffered to neutralize that acid and tested to remain stable long term.
Matting, Backing Board, and Museum-Grade Materials
A proper archival build has four layers working together:
- Mat board: 100% cotton rag or alpha-cellulose, buffered, with a bevel cut that keeps the print off the glass
- Backing board: acid-free, rigid, and moisture-resistant to stop warping
- Mounting method: hinges or corner pockets that hold the print without adhesive touching its surface
The mat also does aesthetic work. A generous mat creates breathing room and draws the eye inward, which matters more on a large print because the surrounding wall competes for attention.
Step 4: Mounting Techniques and Weight-Bearing Hardware
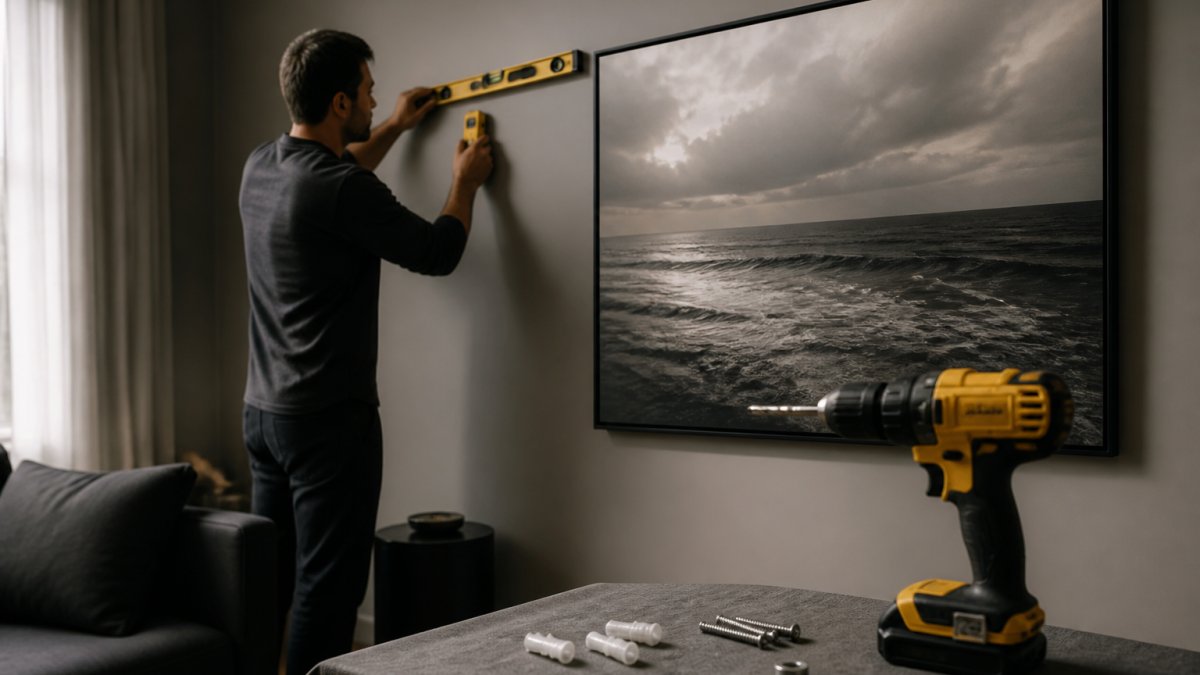
Mounting is where large format photography stops being a design decision and becomes an engineering one. A framed 40x60-inch print behind glass can weigh far more than people expect, and drywall alone will not hold it safely.
Estimate the Load Before You Buy Hardware
You cannot choose hardware until you know what you are hanging. Rule of thumb: a framed and glazed print weighs roughly 3 to 5 pounds per square foot of finished frame area, depending on glazing and frame material.
Run the numbers on a 40x60-inch piece:
- Finished area: about 16.7 square feet
- At 4 pounds per square foot: roughly 67 pounds
- Add a French cleat, backing board, and hanging hardware: another 3 to 6 pounds
That is a 70-pound object. A single drywall hook rated for 20 pounds is a failure waiting to happen. Anything over about 30 pounds should be anchored into structure or spread across a cleat, and anything over 50 pounds deserves a second look at the wall itself.
Match Hardware to Wall Type
Different walls fail in different ways. The hardware that works on one can pull straight out of another.
- Wood studs (drywall over framing): the gold standard. Studs typically sit on 16-inch centers, sometimes 24. Drive structural screws directly into the stud. A piece spanning two studs with a French cleat is the most secure common setup.
- Hollow drywall, no stud where you need it: toggle bolts and heavy-duty strap toggles spread the load behind the wall surface. Strap toggles are rated far higher than plastic expansion anchors and are the right choice for oversized frames. Never rely on a plastic sleeve anchor for a large print.
- Plaster and lath: older and more brittle than drywall. Standard toggles can crack the plaster face. Use anchors designed for plaster, drill slowly, and consider a cleat that distributes load across a wider area.
Why a French Cleat Beats a Single Hook
A French cleat is a two-part interlocking system: one beveled rail mounts to the wall, a matching rail to the back of the frame. The frame drops onto the wall rail and locks level. Three things make it best for large format work:
- Load distribution. Weight spreads across the full width of the cleat instead of concentrating at one or two points.
- Leveling. The frame self-levels as it seats, which matters on a 60-inch piece where a quarter-inch tilt is visible from across the room.
- Security. The interlock resists the frame being knocked off the wall, unlike a hook the frame simply rests on.
For very large or heavy pieces, two anchors beat one, and a cleat beats a single hook every time. If the wall is plaster or brick, the hardware changes again. When in doubt, hire an installer, a dropped print is an expensive lesson.
Step 5: Best Lighting for Large Wall Art
The best lighting for large wall art is soft, angled, and free of UV, because harsh direct light creates glare and slowly destroys the print. Light is the biggest long-term threat to any photograph on a wall, and a large format piece exposes far more surface area to it.
Three principles govern good display lighting:
- Angle it. A light aimed at roughly 30 degrees from the wall grazes the surface and reveals texture without a hotspot.
- Diffuse it. Track heads with diffusers or wall washers spread light evenly across a large surface.
- Control the spectrum. LED fixtures with a high color-rendering index keep colors true, and fixtures that emit little or no UV protect the pigments.
Choose the Right Fixture for the Job
Not every fixture flatters a large print. Three work best:
- Wall washers: designed to throw an even wash down a wall. Ideal for a single oversized piece or a grid, because they eliminate the scalloped hotspots that spotlights create.
- Adjustable track heads with diffusers: flexible for gallery walls where pieces sit at different heights. Aim each head at the center of its piece and keep the beam wide enough to cover the full width.
- Picture lights: mounted on or above the frame. Convenient, but many models run hot and emit UV. If you use one, choose an LED model with a stated low-UV output and keep it off when the room is empty.
Get the Numbers Right
Color temperature and CRI do more for how a photograph reads than brightness.
- Color temperature: aim for 2700K to 3000K in living spaces for a warm, gallery-like feel. 3500K to 4000K reads cooler and more clinical, which suits a modern or commercial setting.
- CRI: look for 90 or higher. Below that, saturated colors in the print can shift, and skin tones in portraits go muddy.
- Brightness: you want the print to read as lit, not spotlit. A common pattern is to keep the wall wash roughly comparable to the ambient room light so the piece does not look like a display case.
Glazing Is Part of the Lighting Plan
Lighting and glazing work together, and on a large print the glazing choice is visible across the whole surface.
- UV-filtering glazing blocks the ultraviolet portion of light that fades pigments. Acrylic and glass versions differ in how much they block and how they age; ask for the UV rating rather than assuming.
- Anti-glare and anti-reflective glazing diffuse or cancel reflections. On a large piece facing a window or a bright room, this is often the difference between seeing the photograph and seeing yourself.
- Museum glass combines UV filtering with anti-reflective treatment and is the top tier, at a corresponding cost.
Avoid placing a large print in direct, unfiltered sunlight. Even with UV glazing, constant intense light accelerates fading. If the only available wall faces a bright window, plan for UV-filtering glazing from the start.
Step 6: Gallery Wall Arrangement and Placement Strategy
Gallery wall arrangement works best when you treat the group as one composition rather than separate pieces. The eye should travel across the arrangement, not bounce between mismatched items.
Start with the centerline. Hang the arrangement so its midpoint sits at roughly eye level, typically 57 to 60 inches from the floor. Then decide the layout:
- Grid: uniform sizes in even rows, calm and formal
- Salon: mixed sizes filling the wall edge to edge, dense and dramatic
- Anchor: one large piece with smaller companions arranged around it
The anchor approach suits large format photography best. Let one commanding print lead, then place smaller pieces in a supporting rhythm. Keep 2 to 3 inches between frames so the group reads as a unit, and lay the whole arrangement out on the floor first.
Step 7: Environmental Protection and Long-Term Preservation
Environmental protection separates a print that lasts from one that quietly degrades. Heat, humidity, and light are the three forces that age a photograph, and all three are manageable.
Keep large prints away from:
- Direct sun and heat sources such as radiators, fireplaces, and vents
- High humidity areas like bathrooms and unfinished basements, where moisture warps paper and invites mold
- Rapid temperature swings, which stress both the print and its frame
For the most valuable pieces, consider museum-grade glazing and a backing that seals the frame against dust and insects. If you are building a collection meant to hold value, ask for verified archival materials and keep the documentation.
Conclusion: Displaying Large Format Photography With Confidence
Getting a large print onto a wall is easy. Getting it right takes resolution checks, correct hardware, archival materials, and lighting that protects rather than punishes the work.
If you would rather skip the guesswork, DE LA Gallery handles it end to end.
Get started with DE LA Gallery and hang a piece you will be proud to live with for decades.
Frequently Asked Questions
What are the best mounting techniques for large format photography?
The right technique depends on print size and weight. Canvas wraps stretch over a wooden frame and hang flush. Acrylic mounting bonds the print to a rigid backing for a clean, frameless look. Metal prints fuse the image to aluminum for durability. For pieces over 30 inches, use a French cleat or Z-bar hardware rated for twice the artwork's weight. Always anchor into wall studs when possible, and use heavy-duty wall anchors for drywall-only installations.
How do I ensure archival longevity when displaying large prints?
Use museum-grade materials throughout: acid-free matting, archival backing board, and UV-protective glazing or acrylic. Keep the piece out of direct sunlight and away from heat sources, bathrooms, and kitchens where humidity swings. LED lighting with low UV output and anti-glare coatings help prevent fading. Ask your framer to confirm the materials meet archival standards, and request documentation so you can verify the longevity claims before you buy.
What is the ideal wall height for hanging large format art?
The standard museum guideline places the center of the artwork at 57 to 60 inches from the floor, which aligns with average eye level. For very large pieces, adjust upward slightly so the bottom edge sits at least 8 to 10 inches above furniture. In rooms with high ceilings, hang higher to fill the visual space. Always measure from the center of the piece, not the top, and account for any furniture below.
How do I choose the right frame for large-scale fine art prints?
Match the frame to the artwork's mood and the room's design. Thin, minimal frames let the photograph dominate, while wider profiles add presence in large rooms. Black or dark wood works for dramatic images; natural or white finishes suit lighter, airier spaces. Frameless options like acrylic mounting or canvas wrap give a contemporary look. Whatever you choose, insist on archival framing materials so the frame protects rather than damages the print over time.